The Jason CLI is a command-line interface tool that you use to initialize, develop, and maintain Jason applications directly from a command shell at design and run time.
Jason Installation
-
Install Java 21
-
Install Visual Sudio Code
-
[windows] Install a terminal & shell tool like GitBash
-
Install Jason:
- Unix and Windows
-
Download a Jason release from here (download the file named
jason-bin-…..zip) and decompress it. The zip file contains documentation, examples, and a sub-directorybinwith the filejason. It is a unix executable file, if not, change its properties withchmod +x jason. Finally, adds the directorybinin your machinePATHso that the commandjasoncan be executed in a terminal. - Linux
-
You can use
apt-getto install Jason (details here):echo "deb [trusted=yes] http://packages.chon.group/ chonos main" | sudo tee /etc/apt/sources.list.d/chonos.list sudo apt update sudo apt install jason-cli
To test the installation, run the command jason --version in a terminal. The output should be as follows:
Jason CLI 3.3.0
Create and Execute Applications
New Jason applications can be created and executed with:
jason app create app1 --console
cd app1
jason app1.mas2j
The first command creates a Jason application identified by app1 with two agents and a shared environment. The third command executes the application. The output:
[bob] hello world.
[alice] hello world.
This approach uses Gradle to execute the application. Gradle is useful if you are using other packages. However, if you do not have dependencies, the application can be started faster without Gradle:
jason mas start --mas2j=app1.mas2jYou can add more agents in the project with:
jason app add-agent karlosTo run agent karlos, there are two options: stop the MAS and run it again; or add karlos in the running MAS:
jason agent start --source="src/agt/karlos.asl" --mas-name="app1" karlosYou can add a Gradle script for the application with:
jason app add-gradleand then run it with ./gradlew run.
More details and commands with (or here):
jason appThen use your preferred IDE to edit the sources of the application, which are in the src folder.
The commands of this section are used to help change the source code of some application. To change or monitor the state of running applications, see the commands below.
Manage (running) MAS
In your preferred terminal, you can start a new empty MAS with:
$ jason mas start --console
In another terminal, you can start another MAS with:
$ jason mas start m1
If you have an application with a .mas2j file, you can start it with:
$ jason app.mas2j
Yet in another terminal we can list currently running MAS and stop them:
$ jason mas list
$ jason mas stop m1 --exit
Agent commands:
$ jason agent start  bob   --mas-name=mas_1
$ echo "\!s. +\!s <- .send(bob,tell,hello)." > x.asl
$ jason agent start  alice --mas-name=mas_1 --source=x.asl
$ jason agent list         --mas-name=mas_1
$ jason agent status bob   --mas-name=mas_1
$ jason agent mind   bob   --mas-name=mas_1
$ echo "+b <- .print(perceived(b))." > y.asl
$ jason agent load-into alice --mas-name=mas_1 --source=y.asl
$ jason agent mind alice   --mas-name=mas_1 --plans
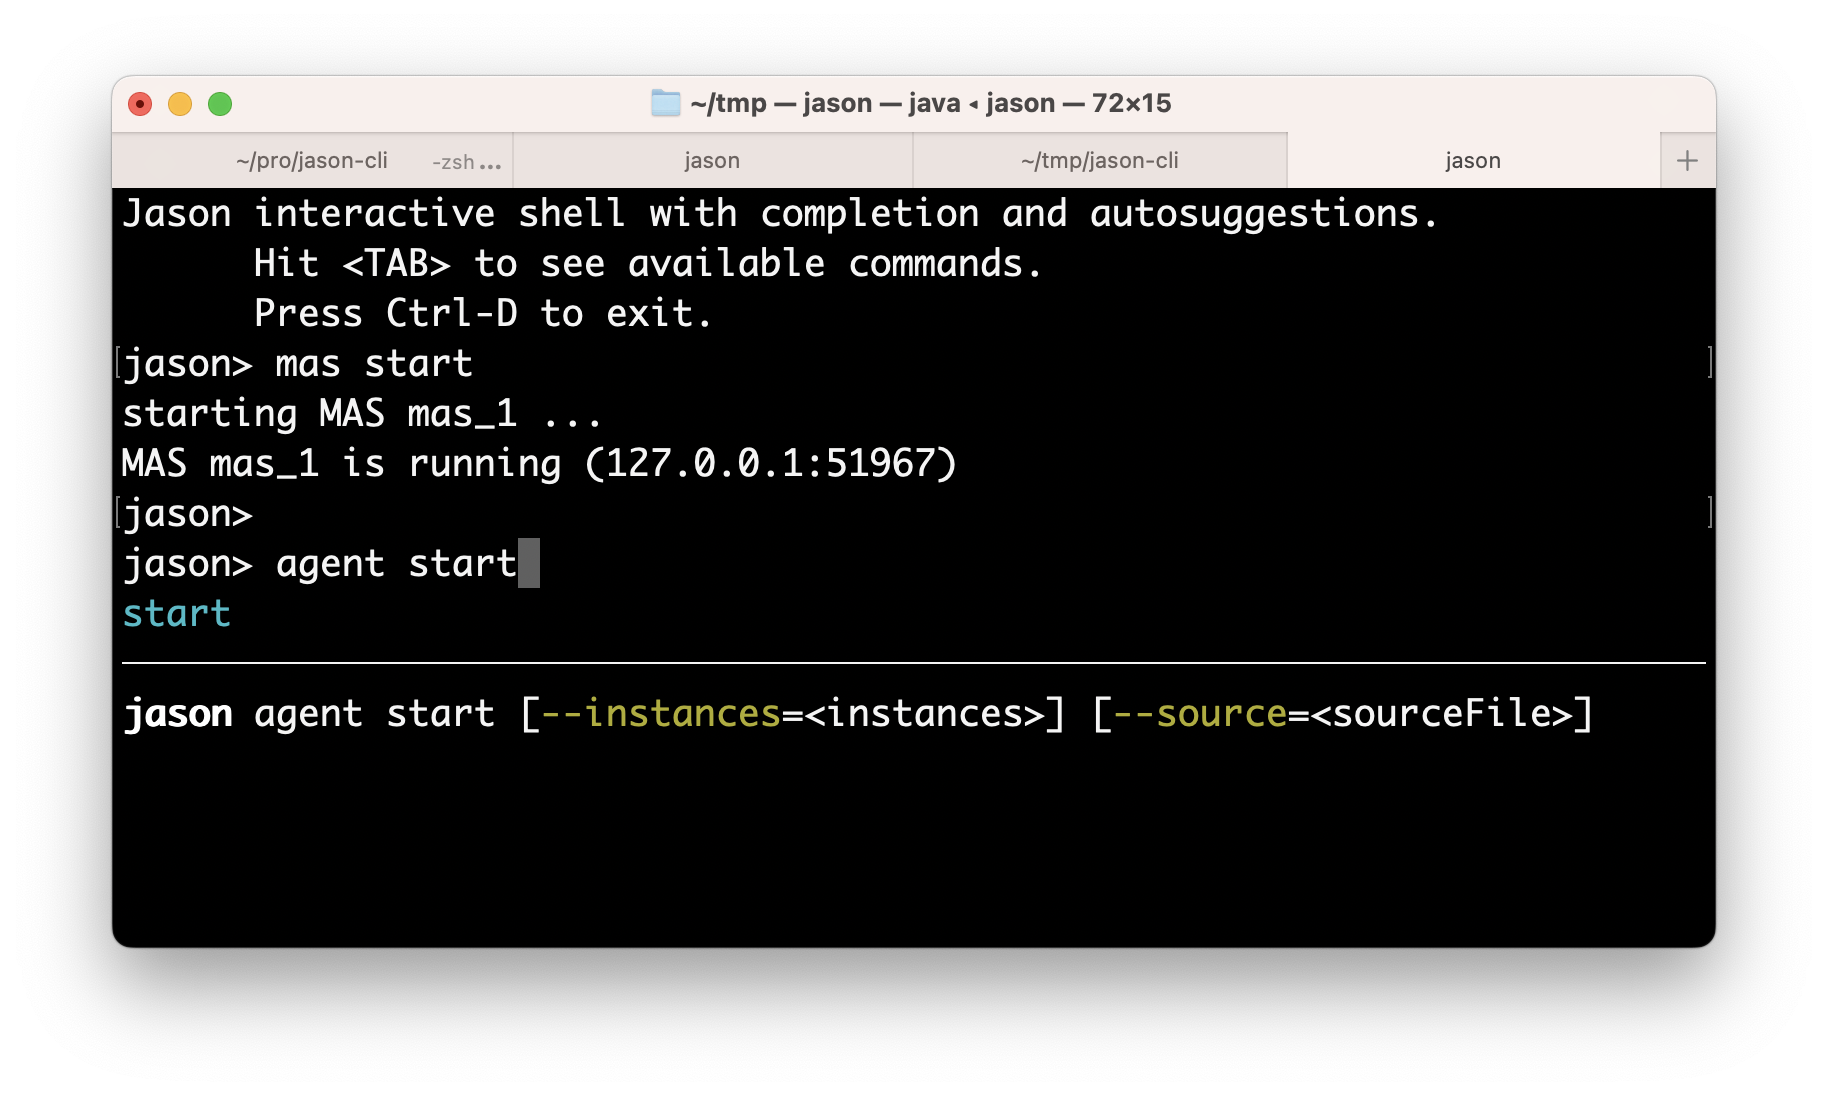
Interactive Shell
To open the Jason shell, simply execute jason:
$ jason
Jason interactive shell with completion and autosuggestions.
  Hit <TAB> to see available commands.
  Press Ctrl-D to exit.
jason>
the <TAB> key is your new 'mouse' to explore the system.
Example of use:
jason> mas start
jason> agent start bob
jason> agent start alice {
    !start.
    +!start <- .send(bob,tell,hello).
}
jason> agent mind bob
    hello[source(alice)]
jason> agent run-as bob { .send(alice,tell,hello) }
jason> exit
In this example,
-
an (empty) MAS is created in the first command,
-
agent bob is created (second command) — with no beliefs or plans;
-
agent alice is created (third command) — with an initial goal and plan.
-
alice achieves the goal
!startby sending a message to bob -
the beliefs of bob are shown (fourth command).
-
bob also send a hello message to alice (fifth command).
-
the MAS is finished (last command).
The shell provides completion and suggestions (using <TAB>).
Scripts
Create a script file, for instance, a file called hello.jcli with content:
mas start

# starts bob with a plan
agent start bob    { +hello[source(A)] <- .print("hello from ",A). }

agent start alice
agent run-as alice { .send(bob,tell,hello) }  # alice executes the .send...

echo
echo "beliefs of Bob:"
agent mind bob         # show beliefs of bob
then run the script with
$ jason < hello.jcli
the output in the MAS Console will be:
[alice] done
[bob] hello from alice
and the output in the terminal is:
starting MAS mas_1 ...
MAS mas_1 is running (127.0.0.1:59052).
agent bob started.
agent alice started.
beliefs of Bob:
    hello[source(alice)]
<end of script>
(the list of all commands is here.)